Archive for August, 2009

Out with the Old – In with the New

August 28, 2009

Wow, it’s hard to believe it’s almost fall!  Seems like yesterday we were filling the greenhouse.  But it’s not all bad, football, fall colors, and a little relief from the heat!  September (not Spring) also brings the ideal time to over seed or renovate your lawn.  Some of you are looking forward to not having to mow you lawn in the near future, but their are a few of you out their like us that desire the ‘baseball field’ look and feel to your lawn.  This is the time to tackle it.

With that in mind, we recently brought in 4,000 lbs. of grass seed.  Fescue’s, Blue’s, and Rye’s…..Today
(Friday, Aug. 28th) a new shipment of produce has been brought in.  Watermelons, tomatoes, peaches, and apples.  Next week we will be bringing in mums, bulbs, and a new, fresh selection of nursery stock.

As a reminder we also carry pottery, weed fabric, bird feed, bulk topsoil and bulk mulch.

We are glad to be back open and serving St. Joe and the surrounding area.  We have seen a lot of familiar faces this summer and hope we will see you again soon.  Whether it be in the store or meeting with you at your home.  We can’t do it without YOU!

Dividing Peonies

August 26, 2009

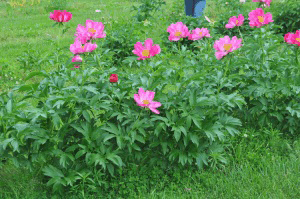
Peonies are a favorite perennial of gardeners because of their beauty and low maintenance. In Kansas, peonies provide a beautiful display of flowers each spring before Memorial Day. Though peonies can be left in place indefinitely, many gardeners wish to increase their plantings and use a process known as division to accomplish this. Keep in mind, however, that peonies often take about three years to return to full bloom and size after division.

Dividing Peonies

Dividing Peonies

Fall is the traditional time to divide these plants. The first step in division is to remove the foliage. Peonies are essentially dormant by September 1 even though the foliage is still green.  Then dig out the entire plant. Shake and wash off as much soil as possible so that the pink buds or “eyes” are visible. Peony roots are tough, and a sharp knife is needed to cut the roots into separate pieces. Make sure each division has three to four buds. Make sure the location chosen for planting receives at least a half-day of full sun. However, the more sun, the better. Space the plants so that there is at least 2 feet between dwarf types and 4 feet between the standard types.

Follow the same rules for planting these divisions as you do for new plants. Make sure the pink buds are about 1 inch below the soil surface. If they are set more than 2 inches deep, flowering may be delayed or completely prevented. As you set the plants, firm soil often as it is added around the plant. If the soil is not firmed, it can settle and pull the plant down with it. Water in well after planting and water as necessary through the fall and winter to keep the soil moist.

It is often a good idea to add mulch to the new planting to protect it from heaving. The alternate freezing and thawing that commonly occurs during Kansas winters can “heave” weakly rooted plants out of the ground. Add a mulch of straw, leaves, compost or other material after the soil freezes. Remember, it is not the cold that harms these plants but the alternate freezing and thawing of the soil. (WU)

Taken from the August 26th Kansas State Research and Extension Newsletter.

Can’t keep up with your yard?

August 25, 2009

If you have an interest in renovating your lawn this fall or maybe you would like to get on a regular schedule for spraying and fertilizing; please let us know.  We would be happy to take a look at your yard ‘at no charge’ and help you understand what that next step is.  We have customers that we visit 4 to 6 times a year to apply different applications.  Whether it be fertilizer, weed control, fungus, or insects.  Along with that we provide customers with overseeding, aeration, and verti-slicing.  Let us know if you would like us to stop by  and turn your lawn into the talk of the neighborhood!

816.749.4400
office@oldmillnursery.com

Lawns in Shade

August 25, 2009

We are often asked, “What’s the best shade grass for our area?”  The answer is simple but requires explanation.  Tall fescue is the best shade grass for our area.  That does not mean that tall fescue is a super shade grass.  True fine leaf fescues such as sheep’s fescue, hard fescue, and creeping red fescue are actually better adapted to shade than tall fescue, but they have difficulty surviving our summers.  It might be better to say that tall fescue is the best shade grass adapted to Missouri conditions.  However, large trees that produce deep shade will not allow tall fescue to survive over the long term.  I say “over the long term” because fall-planted cool-season grasses will often do well under shade trees through the fall and spring when there is less leaf cover and growing conditions are better (cooler and moister) than in the summer.  We often see people plant tall fescue in the shade each fall and then wonder what happens the following summer.  The answer is stress from multiple fronts.  Sunlight that passes through the leaves of trees has had most of the “good” light that drives photosynthesis stripped out.  The grass struggles to make the food it needs for survival and growth.  When this poor diet is combined with the additional stresses of drought and heat, tall fescue is unable to survive.

For those who insist on continuing to try to grow grass in shade, go with a much lighter seeding rate.  Where we usually recommend 6 to 8 lbs. of fescue seed per 1,000 sq. ft., shady areas should be planted to 1/2 that rate, 3 to 4 lbs. per 1,000 sq. ft.  The decreased light levels will not support a thick, plush lawn.  Tall fescue planted at this 1/2 rate will survive longer.  Think about it, it is only logical that less light will not support more plants.  The turf will be thinner, but it will be much healthier at the lighter seeding rate.  However, this will work only if the shade is not too deep.

So what should you do if you have too much shade for your turf?  You have three choices.  Reduce the shade by pruning up the lower branches of your trees so more early and late sun reaches the turf.  This is not practical with many trees because it can destroy the desired shape.  A second option is to plant a groundcover that is well adapted to shady sites such as Periwinkle or English Ivy.  Another solution would be to mulch the area under the tree.  (WU)

Taken from the August 19th Kansas State Research and Extension Newsletter.

Fall Lawn Seeding Tips

August 20, 2009

The keys to successful lawn seeding are proper rates, even dispersal, good seed to soil contact and proper watering. Evenness is best achieved by carefully calibrating the seeder or by adjusting the seeder to a low setting and making several passes to ensure even distribution. Seeding a little on the heavy side with close overlapping is better than missing areas altogether, especially for the bunch-type tall fescue, which does not spread. Multiple seeder passes in opposite directions should help avoid this problem.

A more serious error in seeding is using the improper rate. For tall fescue, aim for 6 to 8 pounds of seed per 1,000 square feet for new areas and about half as much for overseeding or seeding areas in the shade. Using too much seed results in a lawn more prone to disease and damage from stress. The best way to avoid such a mistake is to determine
the square footage of the yard first, and then calculate the amount of seed. Using too little seed can also be detrimental and result in clumpy turf that is not as visually pleasing.

Establishing good seed to soil contact is essential for good germination rates. Slit seeders achieve good contact at the time of seeding by dropping seed directly behind the blade that slices a furrow into the soil. Packing wheels then follow to close the furrow. The same result can be accomplished by using a verticut before broadcasting the seed, and then verticutting a second time.

Core aerators can also be used to seed grass. Go over an area at least three times in different directions, and then broadcast the seed. Germination will occur in the aeration holes. Because those holes stay moister than a traditional seedbed, this method requires less watering. If seeding worked soil, use light hand raking to mix the seed into the soil. A leaf rake often works better than a garden rake because it mixes seed more shallowly.

Water newly planted areas lightly, but often. Keep soil constantly moist but not waterlogged. During hot days, a new lawn may need to be watered three times a day. If watered less, germination will be slowed. Cool,
calm days may require watering only every couple of days. As the grass plants come up, gradually decrease watering to once a week if there is no rain. Let the plants tell you when to water. If you can push the blades down and they don’t spring back up quickly, the lawn needs water.

Once seed sprouts, try to minimize how much traffic (foot, mower, dog, etc.) seeded areas receive until the seedlings are a little more robust and ready to be mowed. Begin mowing once seedlings reach 3 to 4 inches
tall. (WU)

Taken from the August 19th Kansas State University Research and Extension Newsletter
Is that an Ant or Termite….?

August 18, 2009

Both termites and ants are able to swarm and may have wings during part of their lives.  Since these insects are close to the same size, people often misidentify flying ants as termites.  Because flying ants do not attack wooden structures like termites, it is helpful to be able to tell the difference.

Fortunately, there are several differences that can easily distinguish between the two.  For example, ants have a thin waist; the waist of a termite is thick.  Also, ants’ antennae are elbowed, while termites’ are straight.  Thirdly, termites have two pairs of wings that are of equal length.  Ants also have two pairs of wings, but theirs are of unequal length.  Homeowners who find signs of termite activity should shop for a reputable pest control firm.

End of the Summer Clearance Sale

August 18, 2009

It’s finally here!  The moment you have been waiting for…..The Sale-O-Rama!

August 19th – August 26th

  • 35% Off B&B Trees
  • 45% Off Select Nursery Stock & Potted Trees
  • 55% Off Perennials & Grasses
  • 65% Off Annuals & Herbs
  • 75% Off Crapemyrtle’s

Check and Double-Check for Bagworms

August 13, 2009

Whether you’re a novice or an old pro at finding bagworms be sure and check your trees and shrubs now for this pest.  They can do considerable damage and even kill numerous plants in the landscape buy they are especially fond of junipers, arborvitae and spruce trees.  They can also be found on black locust, maple and sycamore trees.  If you haven’t checked for bagworms you should and if you have checked you should do a double check for them.

The bagworm is a native moth and is thought to feed on 128 different plant species.  Last season they seemed to be in high numbers and they are showing up in all parts of Northwest Missouri this summer.  I’ve observed active bagworms from Buchanan County area to counties along the Iowa border.  The cooler wet conditions this spring may have slowed them down some.  We generally recommend controlling them while they are young, before they get 3/4 to an inch long.  Although we nearly past the recommended time for spraying, the bagworms I’ve seen are still small so treating for them should be successful.

Some bagworm facts:

  • The bagworm is a native plant pest that can be found feeding on plants in the landscape, especially coniferous (needled evergreen) plants.
  • They generally start hatching the end of May to the first part of June and eggs will continue to hatch for 2-3 weeks or more.
  • The young larvae (worm) starts forming a silk bag around its body as it starts feeding on the host plant.  The females will remain in this bag their whole life.  A male will pupate and emerge from the bag as a clear wing moth to mate with the female around mid September.
  • After mating a female will lay from 500-1,000 eggs in the bag.  The eggs overwinter in the bag and will hatch the following spring (around the 1st part of June).
  • They can hatch for a period of 2 to 3 weeks until about mid June in most years.  There is 1 generation per year.
  • They should be controlled after hatching is complete and while they are still young (less than an inch long).

Some species of bird such as the sapsucker and woodpeckers will feed on bagworms as will some insect predators.  You can also pick bagworms off the plant and destroy them by placing the bags in some soapy water.  If this is not feasible there are several materials that can be used for control.  Materials labeled for bagworm control should be affective.  The key for control is to spray when the worms are small and to get good coverage on the plant on the inside and outer edges of the plant.

The ingredients of some of the insecticides labeled for control include:  Bacillus thuringiensis (Dipel), this is a natural material that will make the worms sick and die, good coverage when they are small is essential, Cyfluthrin (Tempo), Acephate (Orthene), Spinosad (Conserve), Carbaryl (Sevin) and Trichlorfon (Dylox) are a few of the insectides available.  The word in the ( ) is a trade name.  There are many other trade names available, these are just a few examples.  Be sure to check the product label and find bagworm on the insects controlled list and follow the directions for mixing and application.

Bagworms will congregate in the top of the tree but they can be found throughout the plant.  Thorough coverage of the plant is important for bagworm control.  The spray material will need to be directed to the inner and outer portions of the plant.  A spray just on the outer perimeter of the plant will not be very effective.  You may want to consider hiring a professional for plantings with dense foliage and/or tall plants.

For more information contact your county MU Extension office and ask for guide G7250, The Bagworm in Missouri.  You can also go to the MU Extension online at http://extension.missouri.edu and search for the guide.  Information for this article was obtained from MU and K-State Extension
Entomologists.

Taken from the Northwest Missouri Extension News.  Written by Tom Fowler, Horticulture Specialist

Sale – O – Rama

August 12, 2009

Tues., Aug. 18 – Sat., Aug 22

Enormous Sale…..Up to 60% off!

Really!  We wouldn’t post it if it wasn’t true!

Only at your locally owned Nursery

2 Workshops to Choose From

August 12, 2009

Rain Barrel Workshop
September 3rd
6:00 – 8:00 p.m.
Missouri Department of Conservation on MWSU Campus
Registration Fee:  $45.00 (Must register by 5:00 p.m. August 26th)

Participants will learn about the benefits of using rain barrels and build their own rain barrel for immediate use.

Raingarden Workshop
September 21st & October 5th
5:30 – 7:30 p.m.
St. Joseph Public Library – 502 N. Woodbine
Registration Fee:  $20.00

If you have low spots in your yard that won’t allow grass to grow because of standing water after it rains or erosion problems where rain water washes away soil from around your downspouts, then this workshop is for you!

For more information on either of these workshops, please contact:
Mark Sander
816.233.3144
mark@mo-kan.org